Showing posts with label Odiya. Show all posts

Wednesday, August 12, 2015

Guguni - Yellow Peas (street food of Odisha)

This is one of the dishes unique to Odisha - a popular street food apart from being akin to Cholley of Punjabi household in a Odiya household. It is the only use of Yellow Peas in my house - if you have any other recipe that uses the same, please do share.


Ingredients

Yellow Peas (dry) - 1 cup, soak overnight
Ginger - 1 inch
Cinnamon - 1 stick
Turmeric Powder - 1 tsp
Salt - 1 tsp
Chilli Powder - 1/2 tsp
Cumin Seeds - 1/2 tsp
Dry Red Chilli - 2-3
Dry Bay Leaves - 3-4
Boiled Potatoe - 2-3, chopped into 1/2 inch cubes
Water - to pressure cook the Yellow Peas and for the gravy
Canola Oil - 1 tbsp
Tomato-Ginger-Garlic-Onion Paste - 10 tbsp (Grind 2 medium Onions, 1 inch Ginger, 2 Tomatoes, 7-8 Garlic Pods)

Onion - Raw, chopped to garnish
Cilantro - Fresh, chopped to garnish
Rock Salt - to garnish, as per taste, optional

Method

Soak Yellow Peas (dry) overnight in water.
Pressure cook the soaked Yellow Peas and chopped Potatoes (1/2 inch cubes or smaller) with Salt, Turmeric, Cinnamon stick and Chilli Powder(optional, as per taste) - I usually cook it for 3-4 whistles. Let it sit till the cooker cover opens by itself.
In a flat pan, hear Canola oil. 
Add dry Cumin seed, dry Bay Leaf and dry Red Chilli and let it sizzle and temper the oil.
Add the ground Tomato-Ginger-Garlic-Onion Paste. Stir often and let it cook.
When the oil separates, add the boiled Yellow Peas and Potatoes (without the water).
Let it cook for 5-10 mins and then add water as per the desired consistency.

Serve hot. Garnish with raw chopped Onion, chopped fresh Cilantro and powder Rock Salt - optional, as per taste!


Sunday, September 14, 2014

Mudi (Puffed Rice) Mixture


We Baripadias (my paternal grandparents place is in Baripada of Mayurbhanj district of Odisha) love our Mudi (aka Puffed Rice). If you have been following this blog, you would seen a few other posts where I mention this.

I can have Mudi with almost every curry. I am not kidding when I say that my mom literally blackmailed me as a kid with it to make sure I eat my veggies.

One favorite breakfast item is mixing Mudi with milk (cream adds richness) and eating it with Potato fries (not French fries) or some other dry curry like Aloo Dum/Brinjal fries/Saag/what not.

Marriage celebration is not complete without one meal of Mudi with fresh-caught Fish fries. And another meal of Mudi and Mutton curry. Yes, we are a non-veg centric cuisine. If the host does not provide this, they are judged severely irrespective of whether they did everything else right and treated the guests royally!!;)

One common snack item is Mudi Mixture. It is nothing but mixing an Indian spicy mixture (store-bought) with Puffed Rice. You can add chopped Onion, Green Chillies, Lemon Juice and Coriander leaves - everything is optional. It is pretty close to the Bhel Puri sans the chutneys.

Monday, July 14, 2014

Posto Bara (Poppy Seeds fritter)


In most Odiya households, there are certain days of the week that are followed as vegetarian days (Mondays and Thursdays are the most commonly followed ones). I am not sure but this may be an entirely unique trait of the Odiya culture. That is in comparison to most other cultures where people are either vegetarian or not. So in those vegetarian days, my mom had to be really innovative to keep us happily fed (us being me and Baba - my dad). Posto Bara was a favorite for those days. It is one of those dishes which is made widely in Odiya and Bengali households.

My dad is from Mayurbhanj and they use poppy seed a lot in their cuisine. Patua also known as Patrapoda is a delicious flavorful poppy seed and mustard seed paste-based dish with tiny fishes cooked in leaf-wrap in the clay oven. My mom can make it in a regular pot as well. I have tried but can never get the same flavors. It is an intricate and careful preparation. My Didi (my paternal grandmom) also used to make it really well. Some food memories for sure...

Posto Bara is something I have been planning to make since ages. However, my last few attempts at making anything using poppy seed has been a disaster - too much mustard leading to bitter taste, coarse paste texture due to incompetent blender, etc, etc. So finally I turned around and got enthu to take another stab at it. Voila - it was a success. We loved it! Friends visiting us loved it! Got another friend who was missing her mom's food to try it - She also loved it! :)

My childhood friend Sonali's preparation - One of the best cooks, for sure! :)

This is so easy to make - I am pretty sure I will make it more often now.

Ingredients (makes about 60 small fritters)

Poppy Seeds - 2 cups
Maida - 1/2 cup
Onion - 1 medium, chopped finely
Potato - 1 large, chopped finely
Green Chilli - 3-4, chopped finely (optional)
Garlic or Onion-Ginger-Garlic Paste - 1 tbsp
Cumin-Chilli Powder - 1 tbsp
Salt - as per taste
Canola oil for shallow frying

Method

Soak the Poppy Seeds overnight. I add warm water to begin with.
Take 1/2 tsp Canola oil and fry the finely chopped potatoes to cook it. It can be added as-is to the batter but I did not want to take the chance of it remaining raw.
Grind the Poppy Seeds to a fine batter - not too watery. As you take the batter in your hand, you should be able to mould it to the shape you want.
Add all the ingredients with the Poppy Seed batter and mix well.
Heat oil for shallow frying. Add the prepared batter to the hot oil as shown in pic below.
Cook one side. As it turns crispy and browns, it will easily move. Turn it upside down so that the other side can cook.
Place them in paper towel to pull away the extra oil.
Place them in a wax paper lined container.
Serve hot. Goes well with Rice-Dal as well as an appetizer.

Let me know if you get to try it. Have a great day!


Saturday, May 4, 2013

'Choona Machcha' (Tiny fish)

Something I have loved since childhood. Luckily for me, unlike my mom who had to spend a good of amount of time cleaning these tiny beauties, I get them pre-cleaned. Of course, they lack the freshness since these are frozen. Hey, at least I get them here now!

Maa makes a nice curry of these, these frozen ones don't hold up as well in curry (failed attempt! :)), so went with deep-frying this time round. Hope you like these as much as I did!

Ingredients

I pack Frozen Tiny Fish pack (bought from NJ Indian store - contained about 50 fishes - From Bangladesh)
Rice Flour - about 5 tbsp or more, depending on how crunchy and well-coated you want it
Salt -about 1 tsp, as per taste
Turmeric - 1 tbsp, to cut away the fishy smell
Red Chilli powder - 1/4 tsp, again as per taste
Cumin-Coriander Powder - 1/2 tsp

Method

Completely thaw the fish to room temperature.
Add all the ingredients and mix well.
Keep aside for 15-20 mins
Deep fry in high heat. It gets cooked in no time.

Enjoy with Rice/Dal as we did! It will be a good accompaniment in the Ofiya summer soul food 'Pakhala'.


Sunday, December 23, 2012

Peda using Ricotta Cheese dedicated to Aai

In some of my past posts, I had mentioned my Aai (Odiya word for Maternal Grandmother) and her simplistic yet uber-delicious cooking skills. She was more than an inspiration for me. I trully admire her spirit - she always had a kind word for everyone, even for people she knew did not always mean well for her! How many of us can be like that? Well, she was!


The sad news is that she recently left for heavenly abode. This post is dedicated to her - that's the very little I can do. I could not see her in my last India visit - and this will always remain a disappointment in my life. You may be thinking - why Peda for Aai? Wikipeda page for Peda is here for more information. During my school days, whenever she would visit us, she would get me "Cherry Pedas" - ooh, what a delight they were! They were Pedas in Cherry fruit shape - as my dad says, he is still trying to find where she used to get them from! Those Pedas were special - and will remain so forever for me!


A few years back, my SIL made Pedas out of Ricotta Cheese (I believe from a friend's recipe). When I remembered that, I went googling for "Peda using Ricotta Cheese" - found a number of recipes but I narrowed down on Achu's Kitchen's Peda. Thank you, Achu!

I first made them for a cookie exchange in my friend's place. I knew everyone was making cookies, so I decided to try something Indian! Nan Khatai came to mind, but later decided on the Pedas as they are sweet. The pics from that event. Later on, for my own holiday party, I made them to include in the goody bags. Have received a few compliments so far - glad my friends liked them. So yes, this is a keeper recipe! I am sure I will be making once too often in future - if you try it out, let me know how it goes!


Here is Achu's recipe with minor modification:

Ingredients:

  • Ricotta cheese.................................................................... 15oz.
  • Sugar ................................................................................. 1 cup
  • Milk powder....................................................................... 1 cup
  • Mawa (Nanak brand, grated).............................................. 1/2 cup
  • Clarified Btter( Ghee )......................................................... 2 tbsp
  • Cardamom powder............................................................. 1 tsp
  • Pistachios ( thinly chopped )................................................ 2 tsp / as required to garnish (optional)
Method:
  • Heat a pan and add Ghee to it. I used Butter one time when there was less Ghee in the house.
  • Once it is gets melted, add Ricotta Cheese and cook under low flame for 20 - 25 mins.
  • The moisture content should evaporate fully. Stir it continuously.
  • Next add Sugar to it.The mixture will become watery again.
  • Once the Sugar dissolves with the Cheese mixture, add the grated Mawa and Milk powder and cook till the mixture start leaving from the sides of the pan. It will take 15 - 20 mins.
  • Take a small portion of it and try rolling it into a ball. If it attains the shape without sticking to your palm, then we can access that the right consistency has attained.
  • Add Cardamom powder at this stage and stir well. I grind the Cardomon using a stone pestle and mortar.
  • Remove the mixture from heat and let cool.
  • When warm enough to handle (does not matter if the mixture completely cools down - once I made the above mix in the night and shaped them the next morning), squeeze a small lemon size portion of the mixture between your fingers and palm to form small balls.( apply a little ghee on your palm to avoid sticking).  Give each ball a slight press between your palms to get a flat shape.
  • Garnish with chopped pistachios and saffron (optional). Instead, use the cookie shapers or wood design implanters (Thanks, Maa, for getting those for me - they were a delight to use and such beautiful pattern on the Peda, just like store-bought!).
They will stay good for a week. Store them in an air-tight container in the refrigerator. Enjoy them in this holiday season! :) Merry Christmas!


Saturday, September 15, 2012

Uttapam (Baghara Pitha in Odiya)

Ingredients 

Prepare ahead
Urad Dal - 1 cup, cleaned and soaked overnight in water and a pinch of fenugreek (I use coarsely-ground ones), grind with as little water as you can, keep it aside for 4-5 hrs outside in a warm place to ferment.
End of Prepare ahead


Rice Flour - 1/2 cup, increase if you need to make the batter thicker

Tomato - 2 Medium
Onion - 1 Large
Green Chillies - 2-3

Curry Leaves - a few sprigs
Ginger - 1/2 tsp
Turmeric Powder - a pinch
Hing - a pinch
Mustard Seeds - 1/2 tsp
Canola Oil - a few tbsp
Salt - as per taste

Method

Heat Canola Oil.
Add Mustard Seeds and let it splutter. Add Hing, Curry leaves and chopped Green Chilli.
Add chopped Onion and let it cook. Add grated Ginger as the Onion turns translucent.
As it turns translucent, add chopped Tomatoes.
Add Salt and Turmeric.

Add Rice Flour to the Urad Dal and fold it well.
When the above Onion-Tomato mixture is cooked, add to the Ural Dal - Rice Flour mix.
Mix it well.

Heat a flat skillet using Medium heat.
Add a drop of oil and spread it. You can use a piece of Eggplant or Potato to spread the Oil in the skillet.
Drop a big ladle of the batter and let it spread by itself.

You can cover it for faster uniform cooking.
Turn it over to cook the other side. It takes a good 3-4 minutes to make each Pitha.
Enjoy with hot Indian Garlic pickle or Coconut Chutney.

This is a good use of the leftover Dosa\Idli batter as well.

Wednesday, August 22, 2012

Nadiya Rasa dia Chingudi Tarkari (Shrimp in Coconut Milk Gravy)


Ingredients

Shrimp (Chingudi in Odiya, peeled and deveined) - about 30-40
Salt - 1 tbsp
Turmeric - 1 tbsp
Chilli Powder - 1 tsp

Marinate the Shrimp with the above spices for atleast 30 mins. Depending on temperature outside, you can keep it back in the fridge after coating it well. Cover it with a seal-wrap.

Take a flat heavy-bottomed pan.
Heat 2-3 tbsp Canola Oil in Medium heat.
As it warms up, add the Shrimp in a layer and let it half-cook on one side. You will get a beautiful Orange color. Turn it over and let it cook the other side. You don't need to fully cook it since it will also cook in the curry later. Depending on pan size, you will never to shallow fry the Shrimps in multiple batches. To let you in on a secret, I sometimes fully cook a few of these babies and have them as-is. They taste awesome! Ah, if they are the fresh Prawns of Odisha, I can't imagine you not doing this... :)
Keep them aside. You don't need to place them on paper towel since it is tasty to add the oil back to the curry later.


I use my regular Onion/Tomato/Green Chilli/Ginger/Garlic curry paste to prepare this. It is roughly 2-3 Medium Onions, 2-3 Medium Tomatoes, 2-3 Green Chillies, 1 inch Ginger, 6-7 Garlic Cloves with as little water as possible.

No need to clean the pan used for frying the Shrimp. I reuse the same pan in order to not lose out on any of the flavors - that is why it is a good idea to use an appropriate dish when you start frying, something that can hold the curry while cooking.

Heat 1 tbsp Canola Oil or lesser if the pan still has some oil from the above shallow frying process.
Add 2-3 dry Bay leaves, 2-3 dry Red Chillies, 1-2 Cinnamon stick and 1/2 tsp Cumin Seeds.
As the above whole spices sizzle, add the ground paste of Onion/Tomato/Green Chilli/Ginger/Garlic.

As the curry paste is half-cooked, add a little more oil if required. I try to add a dash of water instead and it usually helps continue the cooking process without burning the curry paste and without the need for the  added oil.

Add 4-5 tsp of Curry Powder, 1 tsp of Coriander Powder and 1 tsp of Garam Masala.
Adding a dash of Paprika Powder gives it a bright color.

10 minutes before you stop cooking, add 1/2 to 1 cup of Coconut Milk (I use canned ones and this is called Nadia Rasa and thus, the name) and mix well. The color is further enhanced with the addition of the Coconut Milk which gives it a nice golden color.


Enjoy with Rice\Roti\Naan anyday!

Funny note - Back home, little babies are also affectionately referred to as Chingudi! LOL!

Thursday, August 16, 2012

Khada Saga Bhaja

Ask any Baripadia (yes, I wear that hat too!) about Mudi - Saga Bhaja (Puffed rice with Stir-fried Greens), you will suddenly find them in a tranquil space! I can start smelling the garlic infused greens..and am transported to the mornings at my parent's house where this is one regular breakfast item!

But it is a bit of trouble for my mom and aunts..coz back home, my Dad and Uncles prefer to get the green freshly plucked in the morning which means they have to be delicately cleaned and individual leaves removed and cut (a time consuming process) quickly enough to prepare it in time! Maa - you rock! :)


I recently found these greens that look like Khada Saga at our grocery store with somewhat larger leaves but oddly enough, it tasted and felt just like Khada saga. I threw away the wrapper before noting the name and also forgot to take pic..but making a note to self to note the same in my next purchase!!

Heat 2 tbsp Canola oil.
Add 1 tbsp Mustard oil.

Peel and crush 1 pod of Garlic - this dish is only flavored by Garlic, so we add lots. It is not a typo - we do add one entire pod of Garlic - the more, the better!!
As the oil sizzles, add the Garlic and 5-6 dry Red Chillies. Mix it well with the oil and cook for about 2-3 mins till the Garlic turns slightly translucent.

Add the chopped greens in batches and mix them well. The greens reduce a lot. Cover them briefly to fasten the cooking process.

I will toss and turn them till they get evenly reduced. After I have managed to get all the greens in the pan, I will cover them in Medium heat for it to cook well and lose the raw taste.

Remember to add Salt as per taste when the greens are half-cooked.


Note - We do not use Turmeric in this stir-fry.

Maa likes to toast 'Badi' (Urad dal fritters hardened in sunshine and stored for later use) and add them to this.

Oh, I forgot but this tastes great if you chop Brinjal\Eggplant into tiny 1/2 inch pieces and cook them in the oil before adding the greens. It gives the dish more volume.

Since I was serving this akin to Collard Greens with my Burger dinner menu, skipping the Eggplants was ok. It tasted great either ways!! :)

Enjoy and have a great time!!

Wednesday, August 8, 2012

Bhendi Bhaja


Another one in the "Bhaja" aka "Shallow fried" series. Ladies-finger was not in my list of favorite foods for a long time. I tried making it once right after I arrived in DC after wedding and hated the slime associated with this veggie - of course I did not know how to work around it!

When my mom and dad were visiting me for the first time, Maa made it and I loved it even more than the non-veg preparations. Ever since, this is a definite item in my grocery list. So the trick to use it is to clean it before chopping and wipe it dry. Then cut it as required with quick brisk cuts and stir-fry them till the sliminess vanishes. I either cut them into pieces as shown in the pic or into long slices. Love it either way and keep making them inter-changeably.


  • Heat 1 tbsps Canola oil. 
  • Add 3-4 dry Bay leaves, 2-3 dry Red Chillies and a pinch of Cumin seeds and let them sizzle. 
  • Add the chopped Lady Fingers (about 20-30 medium-sized ones - I pick the soft to touch ones - Use your civic sense and please don't break them to select for shopping though that is the best way to determine good ones! If you break them, buy them - don't leave them for others - ewe!). 
  • Add Salt as per taste and 1/2-1 tsp of Turmeric Powder.
  • Stir fry in High Heat till it looks half-cooked and the spluttering of oil stops.
  • Cover them for 2-3 mins for it to cook well. 
  • Based on how you like them, cook in High heat for added crunchiness and Low heat for softer ones. 

Serve it as a side-dish with Rice or Roti. I usually like them with Rice\Dal or Rice\Mutton Curry or Rice\Fish curry. Enjoy!

A similar Bhendi Bhaja recipe was posted here earlier on.

Wednesday, July 25, 2012

Janhi Poda

Janhi aka Ridge Gourd
Ingredients

1 Medium Ridge Gourd aka Janhi (Odiya), skin removed
1/2 Small Onion, chopped finely
1 Green Chilli, chopped finely
Heavy Cream - 1/4 cup

Method

Preheat oven to 400F.
Bake the peeled and cubed into large pieces Janhi for 20 mins.
Remove from oven and keep it covered.
Dab a paper towel on the Janhi to remove the excess water so that the final dish will be less watery than shown in the pic. I missed this step.
Cut the baked Janhi cube into tiny pieces.
As it cools down, add the Onion, Green Chilli and Heavy cream. Mix them together.
Add Salt as per taste and mix again.


Serve as a side-dish with Rice/Roti - some like it with the Odiya summer food Pakhala as well.

This is Maa's recipe. She makes it often for lunch as a side-dish. I bought Janhi after ages since I don't like peeling it. And I remembered this dish - so of course in the next phone call, I was asking her for the recipe even before anything else. First bite into the dish made me nostalgic - the flavors transported me back to the sunny afternoons of my childhood - alas, those days will never come back! Never.

Wednesday, July 11, 2012

Piyaji - Onion fritters

Ingredients 

Onion - 2 Large, chopped into thin slices
Besan / Gram flour - 2 cups
Ginger - 1 tbsp
Green Chilli - 2-3 or as per heat preference, chopped into tiny pieces
Ajwain - 1/2 tsp - this aids digestion
Turmeric Powder - a pinch for color
Baking soda - 1/8 tsp
Salt - as per taste
Water - to make the Besan batter


Canola oil - for deep frying


Cooking method

Mix all the ingredients except the Canola oil together. First try to mix without adding water. Add a tbsp of water at a time till you get the right consistency - it should not be runny at all so that you an hold small portions of the batter in hand and drop in the hot oil. Add the baking soda (Eno can also be used instead) during the last few folds of the batter.

Heat oil in a wide-mouth heavy-bottom container.

Put a drop of the batter in the oil and wait till the drop rises to the top. Then the oil is warm enough to put small portions of the batter to make the fritters.


We have it as an evening snack or as a side item for main-course. Love some fresh-chopped Onions with Tomato Ketchup\Green Chilli Sauce or some fresh Green Chillies. A dash of Rock salt makes it tangy!

Monday, July 9, 2012

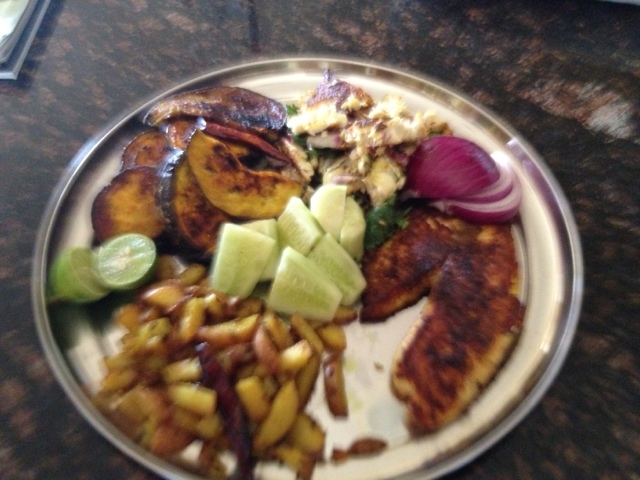
Crumbled Tilapia for Pakhala


Ingredients

Tilapia fillet - 2 (You can use any other fish for that matter! Tilapia is convenient since I don't have to debone it myself.)
Turmeric Powder - 1/2 tsp
Red Chilli Powder - 1/4 tsp
Salt - 1/2 tsp, or as per taste
Pepper Powder - 1/4 tsp
Garam Masala - 1/4 tsp
Fish Masala - 1/2 tsp (optional)


Method

Marinade the fillets with the above.
Keep aside for about 15-20 mins.
In a few tbsps of oil, fry the fillets on one side. Let it fully cook and turn golden brown before turning it over.
Cook the other side.

Crumble the fish with some chopped Onions and fresh Coriander leaves.

I loved it as a dish for Pakhala (traditional Odiya food usually had in summer - the blog post for this is here). We had this with Aloo Bhaja (Potato fry) and Baigana Bhaja (Brinjal fry). Beat the heat with some of this! :)

Saturday, July 7, 2012

Spicy Mutton Curry - a Sunday tradition relooked


Ingredients

Mutton (Baby Goat) - 2 lbs

Marinade ingredients:

Greek Yogurt - 3-4 tsp
Turmeric Powder - 1 tbsp to marinade + 1 tsp during cooking
Salt - to marinade and cook, as per taste
Chilli Powder - 1/2 tsp, or as per taste

Marinade the Mutton with the marinading ingredients. Keep aside for approx. 30 mins.


Cooking ingredient:

(2 medium Onion + 1 inch ginger + 5 cloves Garlic + 1 green Chilli) fine paste - Use 16-20 tbsps of this paste

Canola oil - 2 tbsp
Mustard oil - just a dash, for flavor
Dry Bay Leaf - 2-3
Sugar - a pinch to caramelize
Cumin seed - 1/2 tsp
Cinnamon - 2 big pieces
Shan Meat Curry Masala (Spice) - 3-4 tbsp
Coriander Powder - 1 tsp
Garam Masala - 1/2 tsp
Potato - 5 small, chopped into halves
Water - 3-4 cups


Cooking method:


Heat Canola oil.
As it warms, add  Dry Bay Leaf, Sugar, Cumin seed and Cinnamon. Let the spices sizzle to flavor the oil and the sugar caramelize to impart the gorgeous golden color to the dish.
Add the Onion\Ginger\Garlic\Tomato paste. Mix well. Keep stirring intermittently for even cooking.
As the paste is half-cooked, add Mustard oil - just a dash, for flavor.
Add Shan Meat Curry Masala and mix well.
Add the marinated Mutton and mix well. Let it sit for 2-3 mins before stirring again. This is the most intensive part of this dish. You do develop a few of the hand muscles by cooking this dish. The Mutton slowly starts absorbing the rich flavors of the spices and changes color as it is being cooked.
Add Coriander Powder and Garam Masala as the Mutton is half cooked.
Continue stirring and cooking.
As the oil separates, add small Potatoes chopped into halves. Mix it with the Mutton.
Add Water and mix well.
If you are cooking in another vessel, time to move the dish to the Pressure cooker.
Put the lid on the Pressure cooker and cook till it is about to give the first whistle. Since we get baby Goats, they do not take too long to cook. If you are using older Goats, it will take more time to cook and more whistles in the Pressure cooker.
Let the lid open by itself. Don't force open the lib by flowing cold water on the lid, etc.
If the dish is thin in consistency, heat the dish and let it thicken, if required.


The meat will release fat, so you are more likely to see a layer of fat on top when you open the Pressure cooker lid. One thing to note is that cooking Mutton is labor and time-intensive. It takes about an hour to cook this properly. However, for Mutton-lovers, this is a one-pot meal with plain rice - so cooking actually gets easier per-meal-wise. In Odiya gatherings, people like it so much that they won't even hesitate to ask the host "Mutton acchi na?" (Is Mutton a part of the menu? :) ). I have even seen people not participate in picnics and outings just because their much coveted meat was not a part of the menu - this is a little too extreme, I suggest therapy for these people! :p

Personally, I was never a big fan of Mutton till I got married and started cooking. R loves Mutton and can have it for all three meals of the day, not that he should be allowed to! :) It is always amazing to see his content look when we have this in the menu. Thanks to him - I have an "acquired" taste for this meat after all these years. The other dish that I make well with Mutton is the Biryani - will definitely share it here someday. I make it once too often, but never remember to take a pic. Someday!

Enjoy this favorite Sunday lunch item of Odiya households with Rice \ Naan \ whatever suits you. Have a great day!

Another Mutton curry recipe is here.

Wednesday, June 27, 2012

Tomato Poda

Ingredients

Tomato - 2 large
Onion - 1 small, chopped
Green chilli - 1-2 or more, depending on how hot you like your food! ;)
Fresh Coriander leaves - 2 tbsp, chopped
Salt - a pinch
Sugar - a pinch

Method

Take a heavy-bottom utensil and roast the Tomatoes till it is soft and cooked.
Slightly burning the Tomatoes gives it a nice charred taste.
You should be able to mash the Tomatoes using a spoon at the end of this process.
Add the chopped Onions, chopped Green Chillis and Salt\Sugar.
Mix them well and serve as a side-dish in the main course.


You could also pass this off as Salsa with chips! :)

In the meanwhile, we had a surprise discovery that we have a nice mall very close to our close. And the best part was that it also has a Pinkberry store in there. I had heard so much about it from friends and family but never had a chance to taste before. So went all-in for it after bowling and I was more than delighted on seeing the flavors and their toppings - wow! I am going back in there soon. Pic below shows the Watermelon flavor with yogurt crunchies as topping...yumm!!

Wednesday, May 23, 2012

Kalara Bhaja (Bitter Gourd) and Simple Salad


One vegetable that I have often seen to baffle non-Asians in the local grocery store is Kalara (Odiya word for Bitter Gourd). I have explained what this veggie is to a few confused souls myself. This is a bitter tasting veggie as the name says it! :) The wikipedia entry for the same is available here. The Odiya cuisine calls for a good combination of different things - within a recipe as well as in the entire menu. Having different tastes in a given meal just balances out the flavors. We have different preparations of this - crisp fries, roasted and crushed as well as a drink. If you drink it after boiling and mashing, keep a spoon of sugar handy! :)

As the Wikipedia entry for taste states "The sensation of taste can be categorized into five basic tastes: sweet, bitter, sour, salty and umami. "Umami" is originally the Japanese word for “meaty” or “savory”. Not surprisingly, it is characteristic of many oriental dishes.". Since this veggie is bitter, more so if it is not cooked crisp, it is not a favorite dish for hardly anyone. As a kid, I used to hate it! But note that the medicinal benefits of this dish is immense. It is good for diabetics and helps reduce blood sugar levels. My paternal grandpa "Dada" was diabetic, so whenever he was visiting, this was a regular in our house.

Let me divert a bit! Gosh, as I write this, so many memories come flooding about time spent with him and I am feeling so nostalgic about those good times. Long hours of Ludo games and chatting endlessly about everything under the Sun - he left us a few years back for heavenly abode. He was such an inspiration and always encouraging me to do better and be the "son" to my parents. He treated all his daughter-in-laws as his own daughter; think my Pisi was as comfortable talking to him as my mother. He was a progressive thinker opening schools and college in the village for the progress of the village. Hope I can someday live up to those ideals! Miss you, Dada, everyday - I will always think he is watching over and always there with me.

In the same note, I sure was lucky to be born to this family - feel even more intensely now knowing how prevalent "female foeticide" has been in India over the past decades. I think any girl born over the last 30-40 years and who has got a fair treatment in terms of opportunities and encouragement should be ever grateful to their parents for being high thinkers - to start with, you were not among the 3-crore girls that were aborted! This was recently brought into national attention by Aamir Khan Productions "Satyamev Jayate" program - a very well-researched program with information and statistics covering the entire spectrum of a given issue in 1.5 hours. They plan to cover a different topic every week - now, that is meaningful television which was kinda there in Indian television when I was growing up but not anymore. Is there any comparison between Udaan where they showed Kiran Bedi's story in contrast to the present day shows where the focus is on the woman crying all the time??

In that bitter note, let's move on to a literally bitter recipe! :)

Ingredients

Kalara - 5-6 medium to large
Rice flour - 3-4 tbsp
Salt - as per taste
Turmeric Powder - 1 tsp
Red Chilli Powder - 1/2 tsp

Canola oil - few tbsps for shallow frying

Method

Chop the Kalara into thin slices as shown in the pic.
Mix it with the rest of the ingredients.
Keep it aside for 10-15 mins.
Heat some oil for shallow frying the Kalara.
Use Medium heat. Get done cooking one side before turning it over to cook the other side.

Serve it hot while it is still crisp.
Enjoy with Rice\Chapatti.

We had ours this time with a simple Potato curry, Simple Salad (details below) and Paratha (Indian bread).


Simple Salad


Ingredients

Cucumber - 1
Tomato - 1
Onion - 1 medium
Green Chillis - 1-2 or more, as per taste
Note - You can increase\decrease the amount depending on taste and preference.

Chop everything into similar sliced long pieces.
Mix them together with 1/8 tsp sugar, salt as per taste and some Chat Masala. A little chilli powder can also be added.
To add sourness to the salad, you can add half-lemon's juice.
To make Raita, substitute lemon juice with a few tbsps of yogurt. We have Raita and Salad inter-changeably with dinner.

Maharastrian Misal

Maharastrian Kolhapuri Misal
For the first time, I had Maharastrian Misal (Kolhapuri, to be specific) made with home-made Kolhapuri Masala and Kala Masala. It was yummy! Thanks to my friend, Prajakta, for introducing me to this Maharastrian favorite. Like the mutton curry is one of the favorite Sunday traditions in Odiya house, I was told this is a Sunday brunch favorite in Kolhapur.


Wednesday, May 9, 2012

Odiya Dalma - Maa of all Dals! :p

Dalma is a one-pot wonder that is lentil-based and can include almost any vegetable. I usually make a big pot whenever I make it and it is often! I can have one bowl of this when in mood for soup or something light to eat. Alternatively, I have it with rice or chapatti. A veggie fry on the side makes it a complete meal.

The various vegetables and the Panch Phutana (indigenous to the eastern part of India) give it a distinct flavor. Lightly mashing up a fresh green chilli for the raw heat and the smoked Lanka Jeera Gunda take it to a different level. Did I mention it was easy to make? Yes, it is - all the more reason to make it often. I often wonder how it got it's name - anyone with more info about the same, please share. The reference to "Maa of all Dals" is just me being silly - don't quote me! :p

My parents are not much into dals - so this was something I have picked up in my culinary journey as a convenient item to make when in a hurry. Hope you get to try this!

Ingredients

Toor Dal - 1 and 1/2 cup
Chana Dal - 1/2 cup
Water - 3-4 times the amount of Dal..in this mix, about 6-8 cups of water

Potato - 1 large, chopped into cubes (about 10 pieces)
Pumpkin - 1 inch cubes, about 24 pieces
Brinjal - 1/2 large, chopped into cubes (about 24 pieces)
Zucchini - 1 medium, chopped into cubes
Tomato - 2 medium, chopped in half
Coconut - 2 tbsp, grated
Ginger - 1 inch, grated (I sometimes add it chopped but a bite into it while eating is not that good!)

Turmeric Powder - 2-3 tsp
Salt - as per taste
Chilli Powder - 1 tbsp

Put all the above ingredients in the pressure cooker. Let it boil before putting the pressure lid on.
Wait for one whistle in Medium-High heat.
Reduce heat to Medium and let it continue cooking for another 5-10 minutes.
Let it sit without heat till the pressure lid opens without any push from your end.
When open, stir to mix all the ingredients nicely. Be gentle to avoid mashing everything.

For tempering (aka Chaunk aka Tadka aka Baghar)

Ghee\Canola oil - 2 tbsp
Dry bay leaves - 2-3
Dry red chillies - 2-3
Panch Phutana - 2 tsp

Heat ghee (or Canola oil, as I sometimes use). I use the type of heavy-bottomed utensil that is shown in the pic below which is specifically meant for tempering. Ghee gives it a distinct flavor when used.
Add the dry bay leaves and the Panch Phutana (more about this special spice mix below). Let it roast and splutter. Once it splutters, add it to the cooked Dal mixture available in the pressure cooker.

Let the Dal continue cooking for another 5-10 mins and absorb the flavors of the tempering ingredients. Garnish with fresh coriander leaves (optional). Add a dollop of Ghee when serving - the more generous and less health-conscious you are, the better it will taste! ;)


Wikipedia entry for "Panch Phoron":
All of the spices in panch phoran are seeds. Typically, panch phoran consists of fenugreek seed, nigella seed, cumin seed, black mustard seed and fennel seed in equal parts.[2] Some cooks prefer to use a smaller proportion of fenugreek seeds, which have a mildly bitter taste...
In the tradition of Oriya, Maithili and Bengali cuisine , panch phoron is typically fried in cooking oil or ghee, which causes it to immediately begin popping. This technique is known as "tempering", called ବଘାର (baghaar) in Oriya, ফোড়ন (phoÅ—on) in Maithili or বাগাড় (bagaÅ—) in Bengali and छौंक (chaunk) in Hindi.
 Health benefits of this spice (Source: Tarla Dal)
  • The presence of cumin may stimulate the secretion of pancreatic enzymes, important factors in proper digestion and nutrient assimilation. As with other carminative spices, cumin's digestive stimulating effects are due to its content of volatile oils.
  • Mustard is a good source of selenium and magnesium and is also a good source of omega-3 fatty acids as well as iron, calcium, zinc, manganese, magnesium, protein, niacin and dietary fiber.
  • The seeds of the fenugreek plant are known to be great cleansers of the system and those of fennel acts as a digestive, appetite enhancer.
  • Kalonji seeds have been known to have many healing properties including migraine, chronic colds, palpitations, alopecia, asthma.

Saturday, April 14, 2012

"Lanka Jeera Gunda" with a click

This view caught my attention during dusk. And every time I take a look at it, I feel like humming the Hindi classic melody "Jalte hai dil yahan.." (literal translation: Heart burns here!).


Along the lines of the above click, sharing a very simple spice recipe in this post - it is a ground spice with very earthy flavors. "Lanka Jeera Gunda" means "Chilli Cumin Ground (spice)". It is used abundantly in Odiya cuisine and an essential item in my pantry. Do you have any such spice which is home-made and an integral part of your spice rack without which you have this mildly nagging feel of "I have to get this refilled soon!"? Would love to hear from you.

Without this hot spice, Dahi Vada is incomplete in an Odiya house. It is used prolifically in Dalma "veggies and lentil soup kinda" as well as any of the veggie shallow fries. Add a dash of this spice for added flavor. I usually make the amount below once a year (typically Memorial Day is the day I pick for such type of pantry replenishment tasks!) 

Ingredients:

1 cup Dry Cumin Seeds
2 cup Dry Red Chilli


Dry roast both of them separately since they both have different roasting times.

Sometime I get lazy and roast them together. In that case I dry roast the chillis first and then add the cumin seeds. Since you are roasting chillis, be very careful not to overcook them else you are sure to have the entire house having the smell, everyone going into an eye-burning sensation and sneezing. I usually try to leave the window open when doing this for easy ventilation.

Let them cool down and then dry-grind them. Voila! You have almost a year's supply of "Lanka Jeera Gunda"! :)